
How Do You Get Faster Hands in Hockey?
Last Updated: October 25, 2026
Quick Summary
You get faster hands in hockey by training grip, rhythm, and repetition until quick stick work becomes automatic. Build soft hands with a light grip and wrist-driven touches, then add tempo, overspeed bursts, and weighted contrast sets to push your hands past game speed.
- Keep your hands roughly shoulder-width apart and grip the stick lightly, never with white knuckles.
- Start beginners with stationary side-to-side stickhandling for 30 seconds, five sets, before adding movement.
- Do overspeed bursts of 10 to 15 seconds, then reset with 30 seconds of slow, clean reps.
- Practice on smooth concrete or sport tile, since carpet grabs the ball and hides bad touches.
- Count clean touches in 30 seconds each week to track whether your hands are getting faster.
Table of Contents
- Why Faster Hands Win More Puck Battles
- Stick Handling Fundamentals: Grip, Hand Position, and Soft Hands
- Hockey Stick Handling Drills for Beginners
- Off-Ice Stick Handling Drills You Can Do Anywhere
- Hockey Hand Speed Training: Tempo, Overspeed, and Weighted Contrast
- Hockey Stick Handling Equipment and Surface Setup
- A Progressive 8-Week Plan to Measure Your Hand Speed
- Fixing Common Stick Handling Mistakes and Taking It to Game Speed
- Frequently Asked Questions
Why Faster Hands Win More Puck Battles
Faster hands win puck battles because quick stick work lets a player react, adjust, and control the puck before an opponent can close the gap.
Here's the core tension most training guides miss. Hand speed is not a gift you're born with. It's a trainable skill built from grip, rhythm, and repetition.
Below, we'll show you exactly how to build those hands, from your first grip check to a full eight-week plan.
Stick Handling Fundamentals: Grip, Hand Position, and Soft Hands
Stick handling fundamentals come down to three things: where your hands sit, how loose your grip is, and how softly the blade meets the puck. Get these right and every drill after this works better.
Where Your Hands Go on the Stick
Your top hand controls the blade. Your bottom hand adds power and stability. Keep your hands apart, roughly shoulder-width, so the stick moves freely in front of your body.
Grip the stick lightly. If your knuckles turn white, you're squeezing too hard. A relaxed top hand lets the blade roll from forehand to backhand without fighting the stick.
Relaxed Hands and a Soft Touch
Soft hands mean the puck stays close to your blade instead of bouncing away. Think of catching the puck, not slapping at it. Your wrists absorb the impact, and the blade cushions each touch.
Try this: stick handle a wooden ball while keeping your arms almost still. Let your wrists do the work. That small wrist movement is the engine behind quick touches and smooth control.
Hockey Stick Handling Drills for Beginners
Hockey stick handling drills for beginners should build control before speed.
Skate or walk forward while keeping the puck in your control. This trains hand-eye coordination and forces your hands to work while your feet are busy.
A simple beginner progression:
- Stationary side-to-side: 30 seconds, five sets
- Wide figure-eights: 30 seconds, three sets
- Forward stick handling: 20 steps, five reps
- Backhand touches: 20 touches each hand position
Keep your head up as much as you can. Beginners stare at the puck, which is exactly what defenders want. Glancing up between touches builds the habit early.
Off-Ice Stick Handling Drills You Can Do Anywhere
Off-ice stick handling drills need only a stick, a ball, and a smooth surface. A garage floor, driveway, or basement works fine.
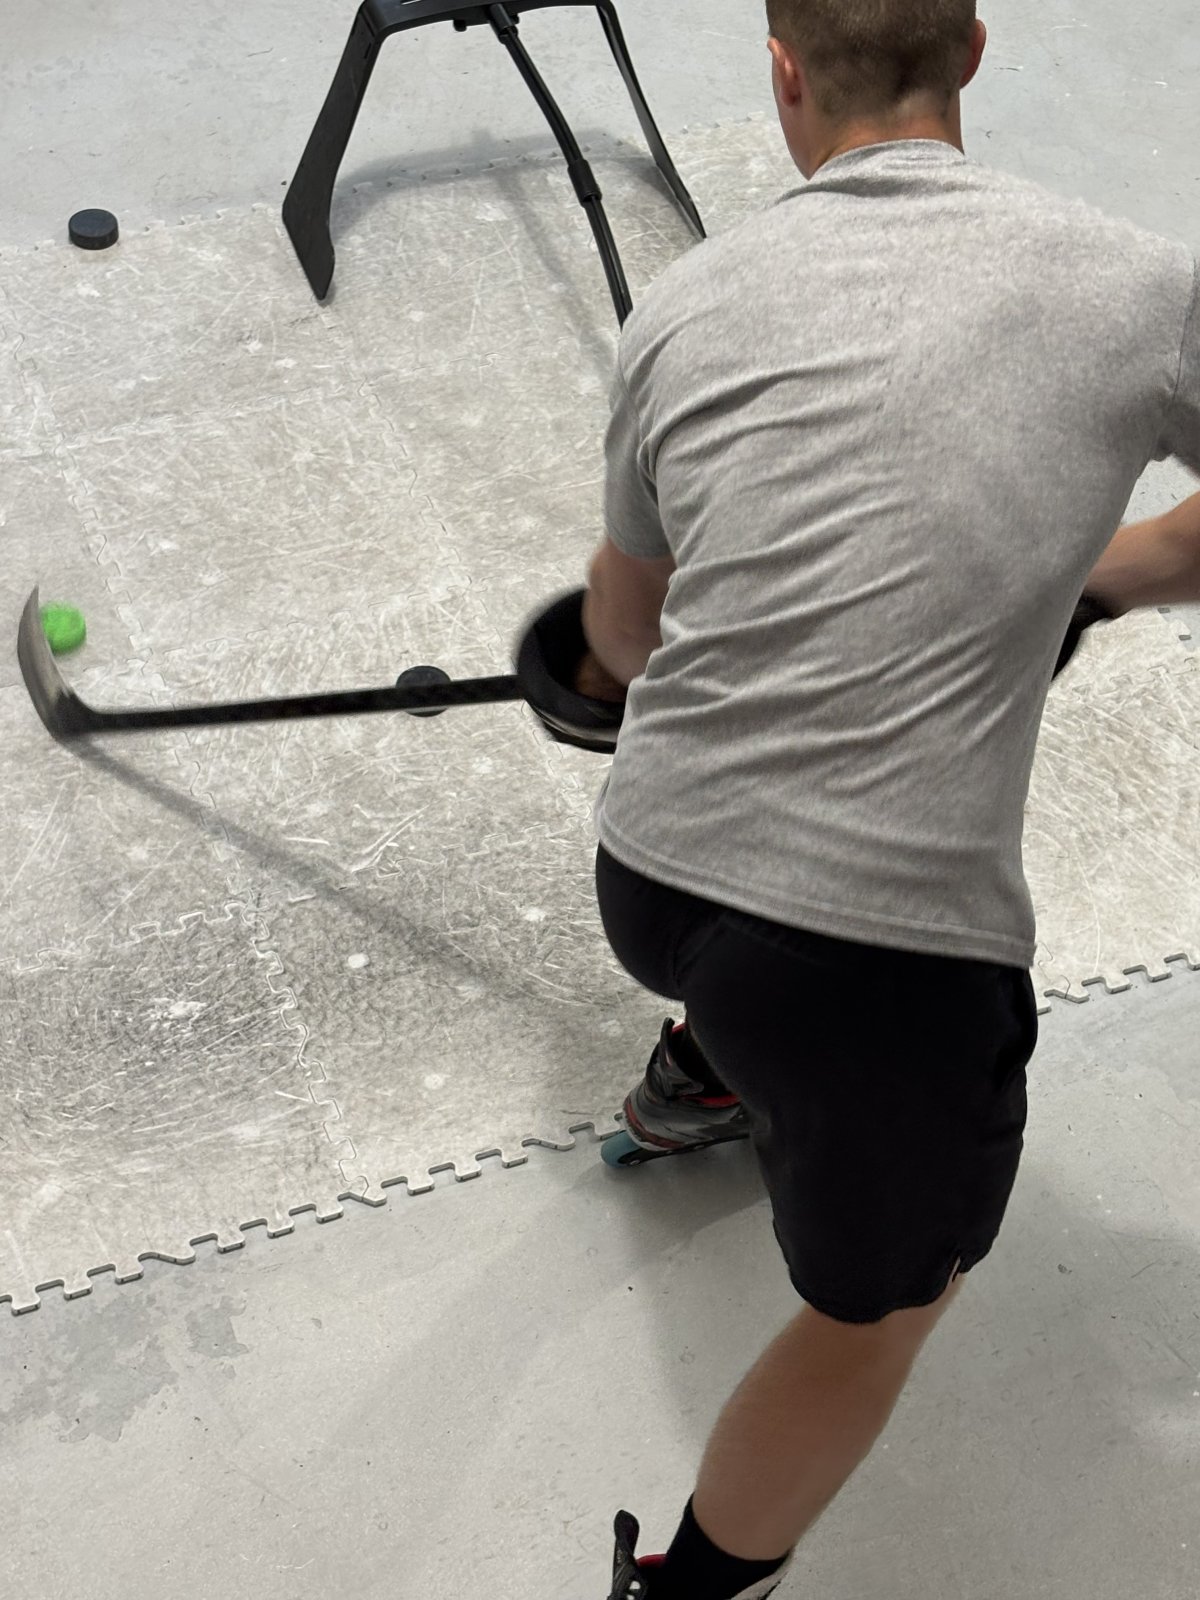
Set up a line of small cones or obstacles. Weave through them using toe drags, forehand-to-backhand moves, and quick touches. Do this for 60 seconds, rest 30 seconds, and repeat four times.
These drills sharpen reaction time and puck protection without needing ice time. If you want a deeper set of options, our guide to off-ice training aids covers the gear that makes home practice work.
Hockey Hand Speed Training: Tempo, Overspeed, and Weighted Contrast
Hockey hand speed training works by pushing your hands past their normal pace, then teaching them to stay smooth. Three methods do most of the heavy lifting: tempo work, overspeed, and weighted contrast sets.
Tempo and Rhythm Work
Tempo work means stick handling to a steady count. Move the puck left-right-left-right at a fixed rhythm, maybe one touch per second. Once that feels easy, speed up the count. Rhythm builds smooth movement, and smooth movement is fast movement.
Overspeed Stick Handling
Overspeed means going faster than game speed on purpose. Your hands will make mistakes, and that's fine. The goal is to train your nervous system to handle a quicker tempo. Do short bursts of 10 to 15 seconds, then reset.
Weighted and Contrast Training
Weighted contrast training pairs a heavy rep with a light rep. You train with added resistance, then remove it and feel your hands fly. This is where a tool like the Lamplighter Hockey Stick Weight fits in.

The contrast effect is the point. Train heavy, then train fast, and your hands learn to move quicker than before.
Hockey Stick Handling Equipment and Surface Setup
Most stick handling guides treat gear as an afterthought, but the wrong setup quietly caps your hand speed. Surface friction, stick length, and implement choice each change how the puck behaves and how much wrist work you need. Get them right and every rep trains the skill you actually want.
Lamplighter Hockey Stick Weight (available in 3 sizes) →
Surface Friction: Why It Changes Your Hands
Surface friction determines how fast the puck or ball rolls and how much the blade has to cushion each touch. On smooth concrete, a ball rolls fast and true, so your hands must react quickly and your blade must stay soft.
A common pattern is to practice on a surface that is slightly faster than game ice. That forces quicker reactions and a softer touch.
Stick Length and Lie
Use your game stick, not a short training stick, so your hands learn the feel of your actual blade and lie. A stick that is too long forces your top hand higher and flattens your wrist roll; too short and you lose reach. If you cut a stick down for off-ice work, match the length you skate with so the muscle memory transfers.
Puck, Wooden Ball, or Weighted Ball
Each implement trains a different quality:
- Puck: Truest to game feel, but it slides unpredictably on rough concrete and can chew up your blade.
- Wooden ball: Rolls predictably and forces a soft touch because it jumps off a stiff blade.
- Weighted ball or puck: Builds wrist strength and makes a standard puck feel light afterward, useful as a contrast tool, not for every rep.
A simple rule: use the wooden ball for most off-ice reps, the puck when you have a smooth surface, and the weighted implement in short contrast sets only.
Keep the Setup Ready
If practice takes two minutes to set up, you will skip it. A permanent corner in the garage with cones already placed beats a perfect setup you never use. Keep the stick, ball, and obstacles together so a session starts in seconds.
A Progressive 8-Week Plan to Measure Your Hand Speed
A progressive plan beats random practice every time. Here's an eight-week structure you can track. Measure your hand speed with a simple timed test: count clean touches in 30 seconds and write the number down each week.
Week |
Focus |
Drill Time |
What to Track |
|---|---|---|---|
1-2 |
Grip and soft hands |
10 min/day |
Clean touches in 30 sec |
3-4 |
Tempo and rhythm |
15 min/day |
Touches at fixed tempo |
5-6 |
Overspeed bursts |
15 min/day |
Burst speed, error rate |
7-8 |
Weighted contrast |
20 min/day |
Game-speed touch count |
Log your touch count after every session. If you want a structured program to follow alongside this plan, our Power Shooting: Shooting and Stick-Handling Training - Subscription Plan gives you coached reps to pair with it.

Fixing Common Stick Handling Mistakes and Taking It to Game Speed
Naming a mistake is easy; correcting it is the work. Below are the four problems that show up most often, how to spot each one, and the specific fix. Then we connect off-ice reps to game-speed decisions so your hands hold up under pressure. For more ways to practice at home, see our Hockey Shooting Drills at Home: A Complete Guide.
Mistake 1: Stiff Wrists and a Death Grip
How to spot it: Your forearms burn after a short session, the puck bounces off your blade, and your knuckles are white on the stick.
The fix: Loosen the top hand until the stick can roll in your fingers. Do 30 seconds of stick handling with your arms almost still and let only your wrists move. If the puck stays close, your grip is right. If it jumps away, you are still squeezing.
Mistake 2: Too Much Upper-Body Movement
How to spot it: Your shoulders sway and your head bobs while you stick handle, and you lose the puck when you try to go faster.
The fix: Stick handle in front of a mirror or phone camera and watch your shoulders. Keep them square and quiet; the movement should come from the wrists and forearms. Slow down until the sway disappears, then rebuild speed.
Mistake 3: Losing Control at Higher Speeds
How to spot it: You are clean at a slow tempo but the puck sprays away the moment you push the pace.
The fix: This is normal in overspeed work, the goal is controlled sloppiness. Do 10- to 15-second bursts just past your clean speed, then reset with 30 seconds of slow, clean reps. Over weeks the fast tempo becomes the clean tempo.
Mistake 4: Eyes Down
How to spot it: You stare at the puck and cannot call out what is happening around you.
The fix: Have a partner hold up fingers while you stickhandle and call the number out loud. Start with one hand, then two. This trains you to scan while your hands work, the habit that separates practice hands from game hands.
Measuring the Transfer to Game Speed
Vague goals do not improve. Use a repeatable test so you know whether your hands are actually getting faster:
- Baseline test: Count clean touches in 30 seconds at a comfortable pace. Write the number down.
- Overspeed test: Count clean touches in 15 seconds at maximum controlled speed. Record it.
- Decision test: Stick handle for 30 seconds while a partner flashes fingers; count correct calls.
Repeat all three at the end of each week. A rising touch count and a rising correct-call count mean your hands are faster and your head is up. If touches rise but calls fall, you are training speed without awareness; add more decision drills.
Simulating Pressure
The last step is pressure. Have a partner poke at the puck or close space while you stick handle in a small area. Start at half speed, then build. Players who rehearse pressure in practice react faster when a defender closes in a game, because the speed already feels normal.
Frequently Asked Questions
What drills help improve hand speed in hockey?
Start with quick-touch drills where you move the puck or ball from forehand to backhand as fast as you can for 20 to 30 seconds. Add obstacle drills around cones, toe drags, and reaction drills with a partner calling directions. Tempo work, overspeed sets, and weighted contrast sets build faster hands over time. Keep each rep short and rest fully so your hands stay quick instead of tired.
Can off-ice stick handling drills improve hand speed on the ice?
Yes. Off-ice stick handling drills train the same wrist movement, hand-eye coordination, and quick touches you use on the ice. Practicing on a smooth surface with a wooden ball or training ball builds fast hands and rhythm before you add skates. Players who do off-ice stick handling drills consistently often see smoother movement and better puck control when they get back on the ice.
How often should hockey players practice stick handling?
Short sessions done often beat long sessions done rarely. Aim for 15 to 20 minutes of stick handling four to five days a week, mixing beginner drills with tempo and overspeed work. Keep a simple log of reps and times so you can track progress. A progressive plan that adds difficulty every couple of weeks keeps your hands improving without burning out.
What equipment helps with hockey stick handling practice?
You need a stick, gloves, a puck or wooden training ball, and a smooth surface. Cones or small obstacles help with control drills, and a stick weight adds resistance for contrast training. The Lamplighter Hockey Stick Weight slides into most junior, intermediate, and senior sticks and comes in 1/2 pound, 1 pound, and 2 pound sizes, so players can train with their own stick.
