
Best Off-Ice Hockey Training Aids: 2026 Guide
Table of Contents
- Quick Comparison: Best Off-Ice Hockey Training Aids
- How to Choose Off-Ice Training Aids by Age, Skill, and Goal
- Hockey Stick Weights: Build Shot Power With Your Own Stick
- Hockey Shooting Pad: The Surface That Makes Reps Possible
- Hockey Stick Handling Trainer Options for Puck Control
- Hockey Shooting Drills at Home Using Training Aids
- What Off-Ice Training Aids Actually Cost
- Space, Noise, Durability, and Safety Checklist
- Frequently Asked Questions
Last Updated: October 12, 2026
Quick Comparison: Best Off-Ice Hockey Training Aids
The best off-ice hockey training aids are stick weights, shooting pads, slide boards, rebounder systems, and stickhandling trainers, and the right pick depends on whether you need power, puck control, or footwork. At Lamplighter Hockey, we build our training around one principle: the aid matters less than the reps you actually complete with it.
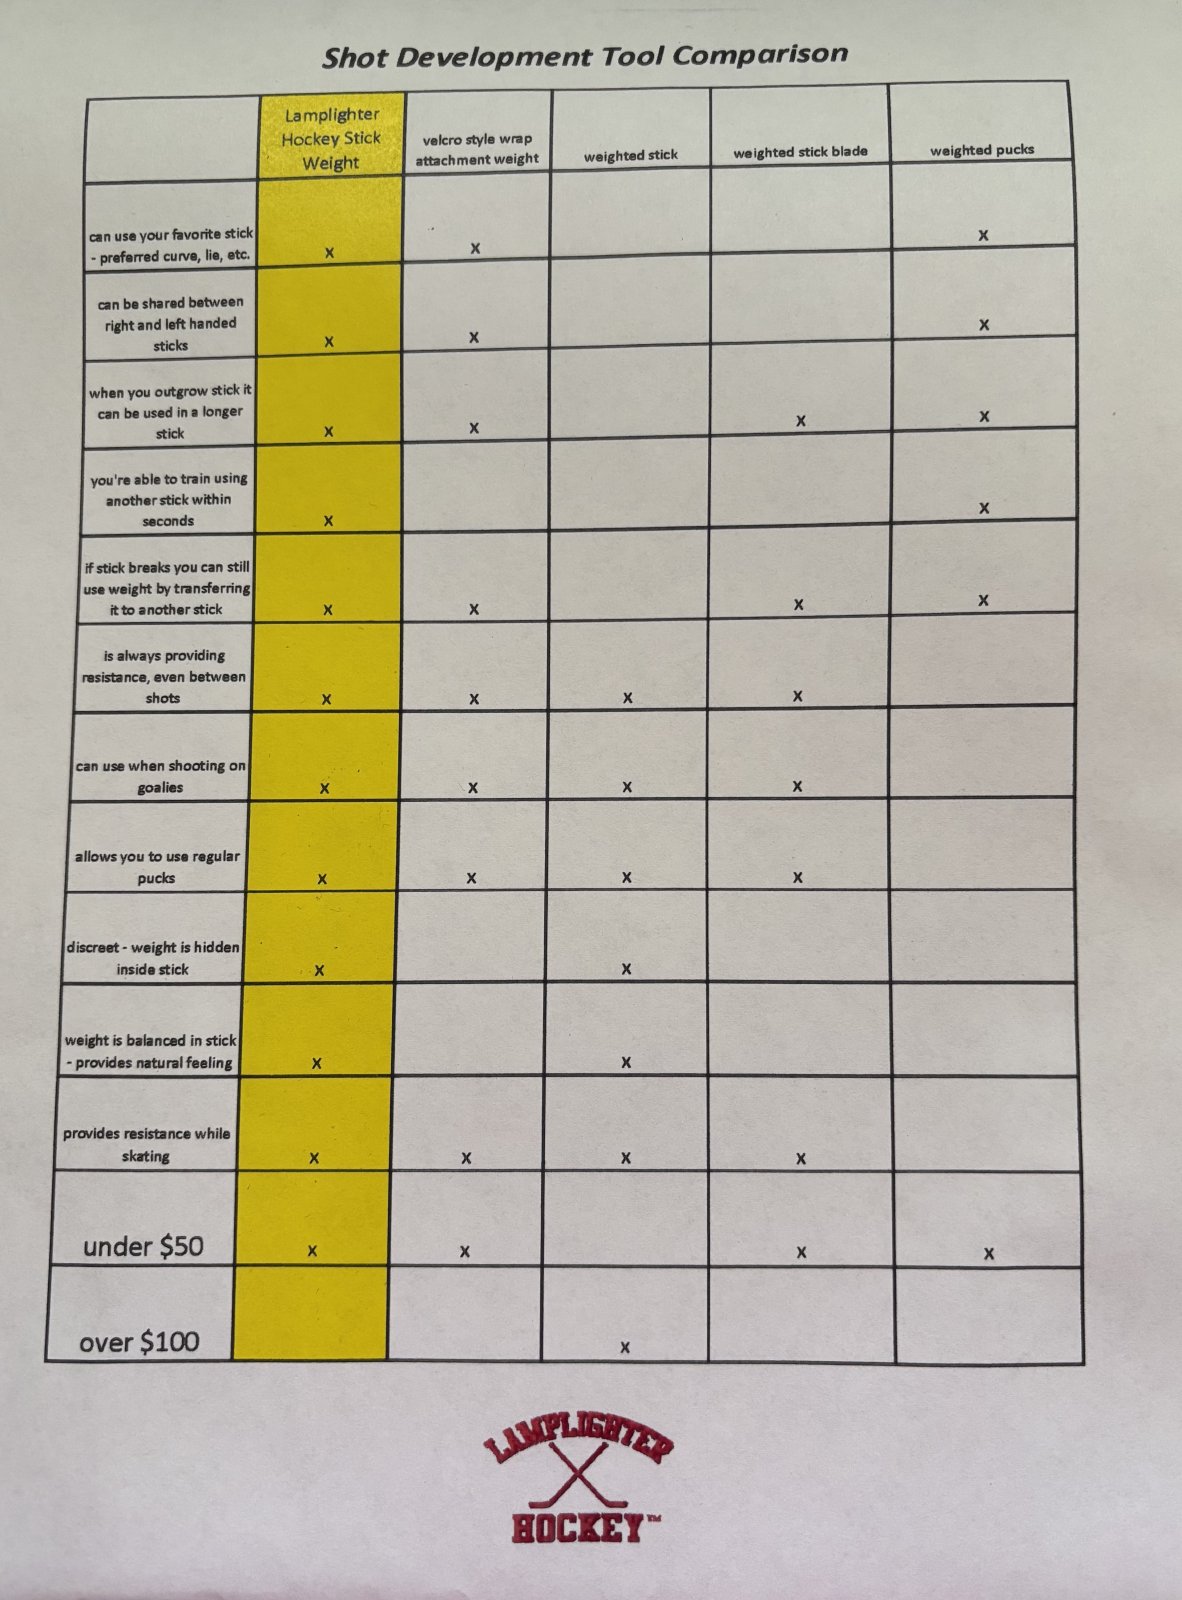
Most parents ask which off-ice hockey training aid is best. The better question is which one removes the biggest obstacle to daily repetition.
Off-ice hockey training builds shooting, stickhandling, and skating mechanics away from the rink using weighted sticks, synthetic surfaces, and rebound tools.
Below, we break down each aid category by cost, space, and player level, plus a training plan that ties them together.
Aid |
Best For |
Space Needed |
Typical Price |
Skill Built |
|---|---|---|---|---|
Stick weight |
Shot power, release speed |
None |
$45 |
Shooting mechanics, upper-body strength |
Shooting pad |
Puck reps anywhere |
4x8 ft |
Varies by size |
Puck control, shot accuracy |
Slide board |
Stride simulation |
6-8 ft length |
Varies by size |
Lower-body strength, balance |
Rebounder |
Pass reception, one-timers |
8-10 ft clearance |
Varies by build |
Reaction time, passing |
Stickhandling trainer |
Puck handling |
Small |
Varies by type |
Coordination, stick placement |
How to Choose Off-Ice Training Aids by Age, Skill, and Goal
Match the aid to the player. A 9-year-old does not need the same tool as a 16-year-old chasing a varsity spot, and buying up a level usually means buying something that sits unused.
For ages 8 to 12, prioritize volume and fun. Light stick weights, a basic shooting pad, and a training ball cover the fundamentals, thousands of touches, not maximum resistance.
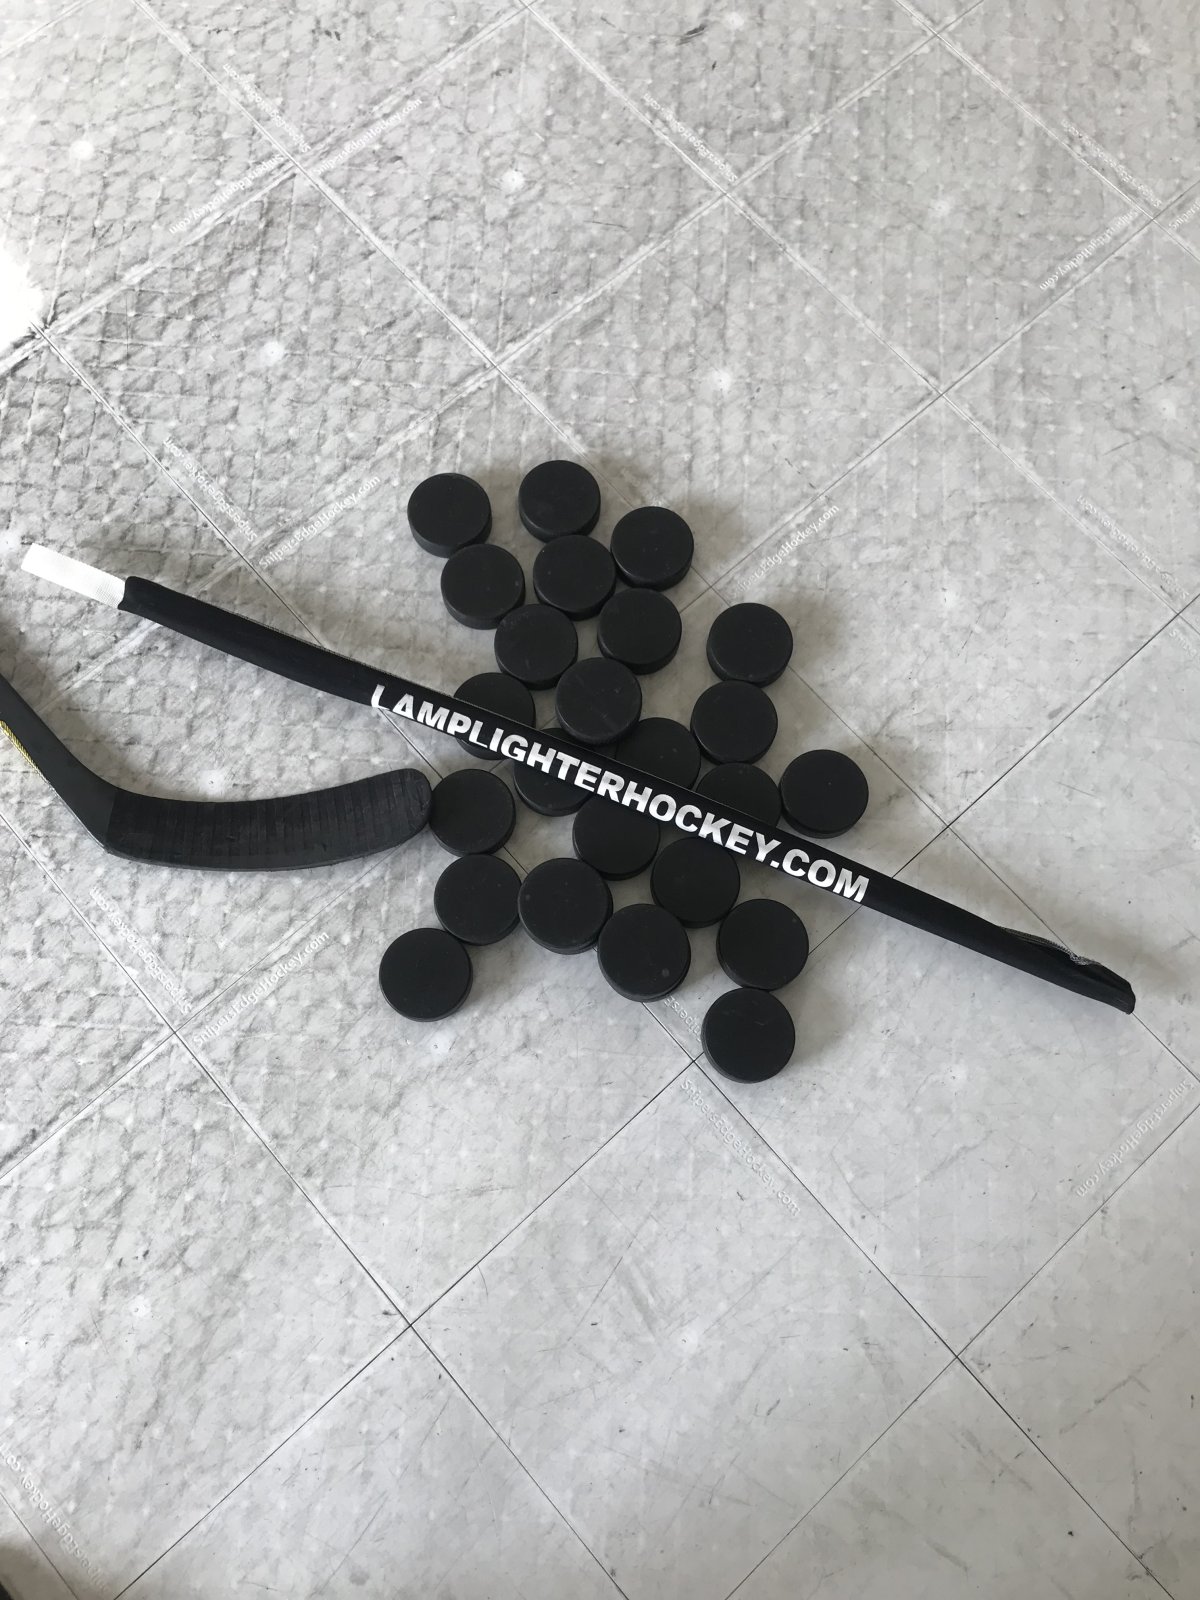
For ages 13 to 18, target specific weaknesses. If shot velocity is the gap, weighted stick work and shooting mechanics drills matter most.
Hockey Stick Weights: Build Shot Power With Your Own Stick
A hockey stick weight is a cylindrical device that slides inside the shaft of your existing stick, adding resistance to every shot and stick handling rep.
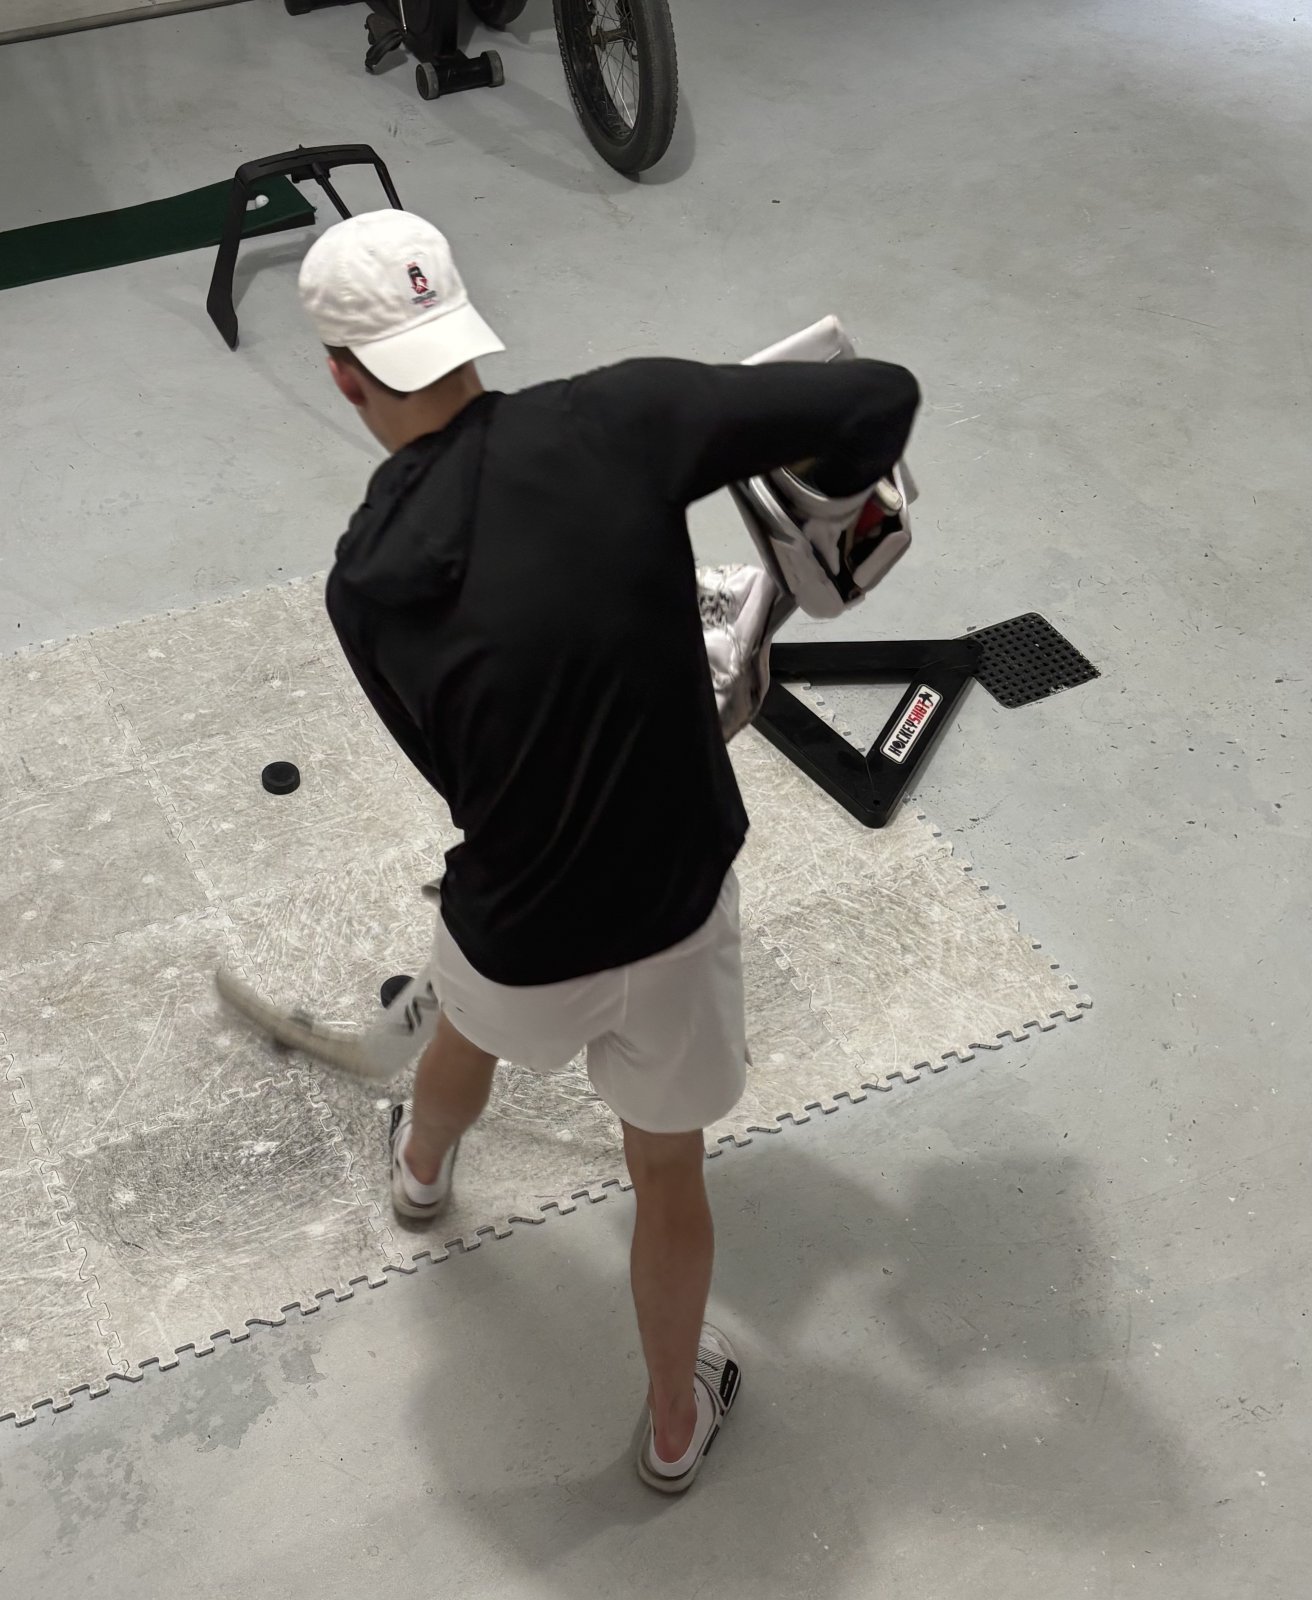
Add resistance during practice, remove it for games, and the stick feels lighter and faster. Our weights slide into most junior, intermediate, and senior sticks with no tape or tools, and the no-slip design keeps them stable through hard shooting sessions.
Picking the Right Weight Size
Size selection matters more than most parents expect:
- 1/2 pound: suitable for 8U and Mites
- 1 pound: suitable for all ages
- 2 pound: built for stronger players, ages 13 and up
The 1-pound weight is the safest starting point for most families: meaningful resistance without forcing a young player to alter their shooting mechanics.
Will the weight damage the stick or throw off balance? It sits inside the shaft, so it does not change how the stick handles or balances, and it comes out in seconds on game day.
Hockey Shooting Pad: The Surface That Makes Reps Possible
A hockey shooting pad is a synthetic sheet that lets pucks slide like they do on ice, turning a garage, basement, or driveway into a practice surface.
Pad size drives everything. A small pad handles stationary stick handling and wrist shots. A larger pad, roughly 4 by 8 feet, supports skating-stance work and moving shots.
Pads are quiet, but pucks hitting a garage door or rebounder are not.
Hockey Stick Handling Trainer Options for Puck Control
A hockey stick handling trainer is any tool that forces precise stick placement and quick hands, from a $10 weighted ball to a $200+ synthetic ice tile setup.
Here is how the main sub-categories compare:
Trainer type |
Skill built |
Typical price |
Space needed |
Durability notes |
|---|---|---|---|---|
Weighted ball or weighted puck |
Hand speed, forearm and wrist strength, feel |
$10-$30 |
None (any smooth floor) |
Years; the only failure point is losing it |
Swedish-style stick handling ball (wood or composite) |
Soft hands, quick direction changes |
$15-$40 |
A few square feet |
Years indoors; degrades if left outside |
Stick handling ball with a weighted core |
Combines both of the above |
$20-$45 |
A few square feet |
Years |
Stick handling trainer with a weighted shaft insert |
Resistance through the whole rep |
$40-$60 |
None |
Years; check the insert for cracks after heavy use |
Obstacle / cone / mini-stick course |
Head-up puck handling, edge control, reaction |
$30-$120 |
4x4 ft minimum, 6x6 ft preferred |
Cones and mini-sticks last; plastic bases crack in cold garages |
Synthetic ice tiles |
Realistic puck glide plus stick handling |
$2-$5 per sq ft |
4x8 ft typical |
5-10 years indoors; edges curl if left in sun |
Stick handling training system with a tether or rebound cord |
Quick hands under tension, reaction |
$40-$150 |
3x6 ft |
Cord and anchor are the wear items |
Selection criteria worth applying before you buy:
- Does it force a mistake to be visible? A weighted ball or puck makes sloppy stick placement obvious immediately. A light plastic ball does not. If your player cannot feel the error, they cannot fix it.
- Does it train the skill under game-like speed? Weighted tools build strength and feel, but they slow the hands down. Pair every weighted rep with unweighted reps at full speed, or the player gets strong and slow.
- Does it fit the floor you actually have? A 4x8 synthetic ice sheet is the gold standard for realistic puck glide, but it needs a flat, dry, dedicated spot. A weighted ball needs a two-foot square of smooth floor and nothing else.
For sloppy puck control, start with a weighted ball or weighted puck. The extra mass makes every mistake obvious, and the feedback is immediate.
For players who already handle the puck well, obstacle courses and rapid-repetition drills build coordination and reaction time.
Hockey Shooting Drills at Home Using Training Aids
Hockey shooting drills at home work best with a simple progression: warm up the hands, add resistance, then finish with game-speed reps. A 20-minute session built this way beats an hour of unfocused shooting.
Here is a routine we recommend to families, run three to four times per week:
Lamplighter Hockey Stick Weight (available in 3 sizes) →
- Warm-up (3 minutes): Stickhandle a ball or puck on the shooting pad, wide and slow.
- Weighted reps (5 minutes): Insert the stick weight and take 25 to 30 wrist shots, focusing on a quick release.
- Remove the weight (4 minutes): Take the same shots without resistance. The stick should feel noticeably lighter.
- Accuracy work (4 minutes): Pick four corners of the net and hit each one five times.
- Passing and reception (4 minutes): Use a rebounder or a partner to practice receiving and releasing quickly.
What Off-Ice Training Aids Actually Cost
Most buying guides list prices for individual products and stop there. The real question is what a workable home setup costs end to end, and that depends on how much space you will give up and how serious the player is.
Here are three realistic budget tiers, built from the categories above. Prices reflect typical retail ranges for the aid types, not a single brand.
Low budget: under $100 all-in
This tier assumes a smooth floor, a wall or garage door to shoot against, and no dedicated space.
- Weighted ball or weighted puck: $10-$30
- Stick weight (1 lb): around $45
- A dozen pucks or a bucket of street hockey balls: $15-$48
Total: roughly $70-$115. This covers stick handling, shot mechanics, and release speed. It does not cover realistic puck glide or skating stride.
Mid budget: $150-$400 all-in
This tier adds a real shooting surface and a rebounder, where most families land once they commit to year-round training.
- Everything in the low tier: $70-$115
- Shooting pad, roughly 4x8 ft: $80-$200 depending on thickness and brand
- Rebounder or puck-return system: $60-$150
Total: roughly $250-$545. The shooting pad is the single biggest quality-of-life upgrade in this tier, pucks glide instead of catching, and the feel of every rep gets closer to ice.
High budget: $600 and up
This tier adds stride simulation and a dedicated training corner.
- Everything in the mid tier: $250-$545
- Slide board, 6-8 ft: $150-$350
- Synthetic ice tiles, 4x8 ft: $60-$160
Total: roughly $550-$1,190. A slide board is the only aid here that meaningfully trains stride and lower-body balance, and it is the one most families skip because of the footprint.
How to think about the spend
A single stick weight costs less than one extra hour of ice time in most markets and gets used year-round.
The mistake is buying the high tier first. Buy one aid, commit to it for a month, and add the next only when the current one has become a habit.
Our own lineup fits into these tiers like this:
Option |
Price |
Tier |
|---|---|---|
Lamplighter Hockey Stick Weight |
$45.00 |
Low |
Power Package (Stick Weight + PowerSk8r Skate Weights) |
$84.99 |
Low |
Team Order of Stick Weights |
$479.88 |
High (team purchase) |
Power Shooting Subscription Plan |
$350.00 |
Mid (ages 5-18) |
Shooting pads, slide boards, and rebounders vary widely in price by size and build, so budget those separately based on your available space.
Space, Noise, Durability, and Safety Checklist
Before you buy anything, measure your space and think about noise. These two factors decide which aids you can actually use at home, and ignoring them is why so much training gear ends up unused.
Run through this checklist before purchasing:
- Shooting space: At least 10 feet of clear length for shooting, more for one-timers.
- Ceiling height: Enough clearance for a full follow-through on the shot.
- Surface: A shooting pad or smooth floor; bare concrete wears down pucks and sticks.
Durability separates tools you replace every season from tools that last.
For families weighing cost against extra ice time, the math usually favors the home setup: a stick weight and a shooting pad are available every day, not just when the rink has open ice.
Frequently Asked Questions
What off-ice hockey training aids help improve shooting?
Stick weights, shooting pads, and rebounder systems are the three aids that directly build shot power and accuracy. A stick weight adds resistance inside your own stick shaft so every practice rep trains the same shooting mechanics you use in games. A smooth shooting pad lets you take rapid repetitions without damaging stick blades on concrete. Rebounders return pucks for one-timers and quick-release work. Pairing all three in a 20-minute off-ice hockey training session covers power, release speed, and puck tracking.
Are weighted hockey sticks or stick weights useful for training?
Yes, when used correctly. A stick weight slides inside the shaft of your own stick, adding resistance that builds upper-body strength and shot velocity over time. The key is to train with the weight and then remove it for games, so your stick feels lighter and your release snaps faster. Lamplighter Hockey offers three sizes: a 1/2-pound weight for 8U and Mites, a 1-pound weight for all ages, and a 2-pound weight for stronger players ages 13 and up. The weight fits most junior, intermediate, and senior sticks with no tape required.
What equipment do you need to practice hockey at home?
At minimum, you need your stick, a puck or training ball, and a smooth surface to shoot from. A hockey shooting pad gives you that surface, and it protects your stick blade from rough concrete. Add a net or shooting target for accuracy work, and a stick weight if you want to build shot power. For stick handling, a training ball or lightweight puck works on any hard floor. Total cost for a basic setup runs about $45 for a stick weight, plus whatever you spend on a pad and net.
How often should hockey players use off-ice training aids?
Four to five short sessions per week beats one long session. A 15-to-20-minute routine with a stick weight, shooting pad, and stick handling trainer builds skill through repetition. Use the stick weight during practice and warmups, then remove it for games. Most players see noticeable changes in shot velocity and puck control within 90 days of consistent training. Keep sessions focused: 50 shots with the weight, 50 without, then five minutes of stick handling drills to finish.
How can you practice stick handling off the ice?
Use a hockey stick handling trainer or a weighted training ball on a smooth, hard surface. Start with wide figure-eight patterns to build hand speed, then narrow the movement to quick touches in front of your feet. A stick weight adds resistance during stick handling drills, which strengthens your forearms and wrists. Ten minutes of focused stick handling three to four times per week improves puck control and reaction time. The key is keeping your head up and your hands moving, just like in a game.
Building a more powerful shot takes time, and the players who improve fastest are the ones who train consistently between practices. Lamplighter Hockey makes that easier with durable stick weights that fit the stick your player already uses, a Power Package that pairs shooting and skating strength, and small-group shooting clinics led by coaches with real playing and coaching experience. Get started with Lamplighter Hockey and turn your driveway into a place where real skills get built.